

 by
by Do you want to learn how to make your own Shopify webshop? Then you have come to the right place. At Findtheblogger you get a number of easy-to-understand guides on how to easily get started with creating your own webshop, from idea to fully functional webshop.
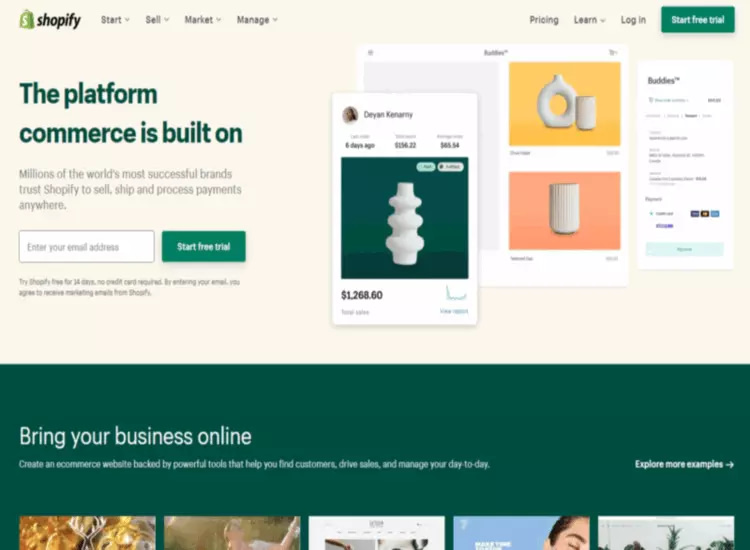
What is Shopify?
Shopify is a hosted solution, which means that your entire webshop is gathered on Shopify’s own servers. It ensures you a stable and reliable solution. In addition, you get an easy and clear backend, from which you can control everything in your webshop. You can quickly get started selling products in your webshop.
Today, there are more than 1,800,000 webshops in 175 countries that use Shopify and it is thus one of the most popular and used e-commerce platforms in the entire world. The platform has gained popularity by being extremely stable, simple, and easy to use.
Why choose Shopify?
Shopify has become one of the most popular platforms to start a webshop, which means that you can easily get help both from professionals and via various forums & Facebook groups.
- Shopify – With Shopify, you can decide for yourself which language you want to use in your webshop. Shopify supports many different.
- Themes – Shopify has a large selection of both free and paid themes to suit many different industries. Furthermore, you can get a unique design made by a designer.
- Professional web design – Shopify has several free themes tailored to different industries. The different themes are adapted to all devices and screen sizes. It ensures a good shopping experience for all your visitors.
- Payment solution – You can easily set up payment on your Shopify webshop. You can either use Shopify’s own payment solution or use an external payment provider such as Quickpay.
- Marketing – With Shopify, you can easily and simply advertise your products on Google and social media like Facebook and Instagram. There are a sea of apps that can help you promote your webshop across various social media.
- Growth – Shopify is both a good beginner solution and a platform in which your business can grow indefinitely. It is thus a future-proof solution.
- Cheap webshop – Shopify is a good way to get started with your webshop without it costing half a farm. You can get a Shopify webshop for $29 per month.
- Support – Shopify offers 24-hour English support to all customers, as some of the only ones in the world. This means that you can quickly solve your problems and get answers to your questions in relation to your Shopify webshop.
In this part, I review the different options that you have in Shopify. After reading this post, you have an understanding of what setting options you have with Shopify. In this guide, you will also find out how you can quickly and simply receive payments in your webshop.
Shopify Prices
The price for Shopify’s platform is divided into a fixed monthly subscription and a percentage of your turnover. These prices depend on which subscription you have. Do you have e.g. Basic Shopify costs $29 and 2% of revenue per share/month?

Please note that if you want to view home parcel stores, you must pay for 1 year at a time or be part of the “Advanced Shopify” package or an additional $20 each. month.
Creation of Shopify Webshop
The good thing is that you sign up for a 14-day free trial period, where you can test your webshop before you have to pay money for one of the packages. That way, you also know more about which package is right for your needs. To make it very simple, you get it in a series of steps for what you need to do.
Get your 14 days free with Shopify
You start by getting 14 days free from them. That way, you can see what their webshop platform is like before you pay for it.
Affiliate disclaimer:“This post contains affiliate links. If you use these links to buy something we may earn a commission. Thanks.”
Give your Shopify webshop a name

Here you have to choose your name for your webshop. Don’t worry, you can easily change the name later. Once you have created your account, you can be allowed to design your website and see how Shopify works.
If you select a name that has already been taken, you will be notified.
Now you have created your Shopify Webshop and are ready to create your first product.
Products
Creating products in your webshop is not that difficult, but it can easily take time if you have a wide selection of products. Here you can see step-by-step how to create a product and add all the necessary information.
Click the green Add product button. If you do not have this button, you can also click on the Products tab in the menu on the far left. Then you will come to a new page that looks like this:

Product Title & Description
In the box under the heading Add product you will find 2 fields that look like this:

Add product
- Title is the title of your product. Here you write the name of the product you are selling. It could be, for example, ‘Black scarf’.
- Description is a description of your product. Here you can use the most common functions to change the text to bold, italic or underlined, just like in a regular Word document.
Product images (Media)
Next, you will find a box labeled Media. It looks like this:

Here you can add pictures of the product you are selling. Click the Add files button in the middle of the box. Then a pathfinder will pop up where you can select the images you want to add.
Product pricing
In the next box titled Pricing, enter the price of your product.

Pricing
- Price is the field where you write the price that the customer must pay at checkout.
- Charge tax on this product must be ticked if taxes are levied on the price of your product.
- Compare that price is for if your product is on offer. For example, if you type $9 at Price and $18 at Compare at price, the current price will be displayed relative to the normal price. Visually, the normal price ($18) will be crossed out, and the offer price will be displayed next to it in red ($9). Thus, the customer can see that they are saving $9.
- Cost per item is the price the product has cost you as a seller. For example, if you are selling a product from another manufacturer, you can write down the price it cost you to purchase the product. If you have manufactured the product yourself, you can write the price it has cost in working hours and materials.
Stock and product information
In the next box titled Inventory, you can enter various information about your product that you can use for your own inventory information. The box looks like this:

Inventory
- SKU (Stock Keeping Unit) is a unique code that you can assign to your product to make it easier to identify. It can e.g. help you keep track of your inventory status. You can make your own system of codes, but make sure to keep it consistent and easily recognizable.
- Barcode (ISBN, UPC, GTIN, etc.) is if you want to add a barcode to your product. The code must be of either a new or existing Global Trade Number (GTIN). Bar codes are typically used by resellers, and in some places, it is a requirement that the product has a GTIN number in order to be sold.
- Track Quantity shows the buyer how many copies of the product you have in stock. If you check the box, further down, under Quantity in the Available field, you can enter the number of copies in stock.
- Continue selling when out of stock if you want to give customers the opportunity to buy the product even when it is not in stock. Be sure to check the box only if you are sure you can get more products and keep up with demand.
Shipping of products
The next box you find has the heading Shipping and looks like this:

Shipping
- This is a physical product show if your product is physical. A physical product requires shipping. If you tick the box, you must fill in 3 different pieces of information about your product. If your product is not physical and you, therefore, need to ship it to the customer, do not check the box. For example, if you are selling an online service.
- Weight is the weight of your product. It is important that you write the as accurate weight as possible as this is used to calculate the shipping cost.
- Country of origin is the country the product is produced in and used for if you sell products internationally.
- HS (Harmonized System) code is a code you must enter if you want to use Shopify’s international shipping service. In the field, you can search for the type of your product or for specific HS codes. The code is used by customs officers to identify the product.
Product variants
The last box called Variants is to shows if there are different variants of your product. For example, it could be different sizes, different colors, etc. The box looks like this:

Variants
- This product has multiple options, like different sizes or colors, you must check if your product comes in different variants as mentioned earlier. If you uncheck the box, you will have the option to add Options, which are specifications for the different variants of the product.
Options
- Option 1 is your first variant. Here you can click on the field where it says Size and choose between different categories. Size is size, Color is color, Material is the material the product is made of, etc. You can either choose one of the predefined categories or write your own.
- Separate options with a comma are where you enter each variant of your product. For example, if you have selected Size, you can type “Small”, followed by a comma, “Medium”, etc. “Small, Medium, Large”.
- Add another option you can click on if your product has several combinations of variants. For example, if there are both different sizes and colors. Just click the button and fill in the information.
Save product
Once you have filled in all the information that has been reviewed here, it is important that you remember to press the Save button. You will find the button in the upper and lower right corners, respectively.

When you press Save, all the information will be saved and your product will be created in your webshop. Remember that it is important that you save your product before shutting down your browser – otherwise, you have to start over.
If you have very few products, it may be an idea to link to them in the menu on your webshop. For a review of how to do this, we refer to the Navigation section.
Products – Collections
In Shopify, categories are called Collections – this is where you can create the categories that your webshop should contain.
First, click Products in the menu on the left, and then click Collections. Then you will come to a page with the heading Collections. It looks like this:

Then click on the green button Create Collection. Then you will move on to the place where you can start making your collection.
Title and description (Create collection)
First, give your collection a title and a brief description (the description is optional).

Create collection
- Title is the field where you enter your title on your collection.
- Description is a description of your collection. It is actually optional if you want to write something for this, as it is not certain that customers will be able to see it at all. However, in principle, it is always a good idea to write something in relation to SEO.
Collection Availability
Once you have added a title and a description of your collection, decide which channels the collection should be visible on. To do this, click on the check box next to the text Online Store in the box to the right with the heading Collection Availability.

To change the visibility of sales channels after creating your collection, click Manage. Then a window will pop up where you can choose which associated channels you want to make the collection visible on.

In this case, we only have the webshop itself (Online Store), but in principle, there could be a box with Facebook, Instagram, etc.
We stay just a moment at the box titled Collection availability. Now you have to choose when your collection should be published. Click on the blue text Schedule availability.

Then a calendar will pop up where you can select the date for when your collection will be visible to customers.

Once you have selected a date, click on the field with a clock icon on the left side and select the time of the selected date the collection is published.
Collection Image
The next thing you need to choose is an image for your collection. You do this in the box with the heading Collection Image which is located just below Collection Availability.

Collection image
- Click Add image. Then a pathfinder will pop up where you can select the image you want to use.
Manual or automated collection
The next thing you need to decide is whether to create a Manual or Automated collection.

Collection type
- Manual is a manual collection where you have to choose and add each product that is to be included in the collection one by one.
- Automated is an automated collection, where the system itself can recognize the information you have entered for each product, and use these to divide the products into their respective collections.
We start with a Manual collection.
Manual
If you select a manual collection, check the box next to Manual. Then save your collection by pressing the green Save button. You will find this button in the lower and upper right corners respectively.

Once you have saved your collection there will be a new box titled Products. Here you can add the products that will be included in your new collection.

Products
- Search products you can click to search for a specific product.
- You can also click the Browse button. Then a window will pop up in which you can browse all your products.

- Select the products that are to be part of the collection and press Add at the bottom right of the box.
Automated
Automated collections require less time and effort, as they, as the name implies, work automatically. This type of collection is good if you have many products on your webshop.

Conditions
- Products must match is where you can specify specific conditions that the products must meet in order to be added to a given collection.
- All conditions are if a product must meet all the conditions you add to be included in the collection.
- Any condition is if a product just has to meet one of the conditions you add to be included in the collection
- In the 3 fields under Conditions, you can select the conditions by changing the different options in the boxes.
An example could be with the values Weight + is greater than + 3 kg. This way you can choose between a lot of different combinations.
- Click Add another condition to add a new condition and then fill in the fields in the same way.
Remember to save your work
When you are done, it is important that you remember to press the green Save button to save your work. You will find the button in the upper and lower right corners, respectively.

In order for the customer to be able to find the collection and see it, you must make a link to it on your webshop front page. For a review of how to do this, we refer to the Navigation section.
Discount codes
To create a discount code, click on Discounts in the menu on the left.
- Then you come to a page that looks like this:

- Click on the green button to Create a discount code
Enter your own code name and determine the discount code type
Once you have clicked on the green button Create discount code, you will be taken to a page with a box, with the text Discount code.
It looks like this:

Discount code, you must write the actual code that the customer must enter before payment to get a discount on their purchase. You can either find one yourself or click on Generate code, at the top right, to auto-generate a code. For example, if you create a discount code on the occasion of Black Friday, it could for example be called “BLACKFRIDAY22”.
Types
Under Types, select the type of discount code you want.
- Percentage is for if you want to give a discount, which is a certain percentage of the price.
- Fixed amount is for if you want to give a certain amount in discount (i.e $10).
- Free shipping is for if the discount is to be in the form of free delivery.
- Buy X and get Y is for if your discount code is to be in the form of the customer getting another product when buying a specific product.
Depending on the type of discount code you choose, there will be different information that only needs to be filled out based on that type. We take them one by one in the following sections.
Percentage discount code
If you have selected a discount code in the form of Percentage, you will be able to see a box with the heading Value.

- In the field under Discount value, write what percentage the discount should be. For example, there could be a 25% discount on the total price.
Fixed amount discount codes
If you want your discount code to be in the form of a certain amount that is deducted from the total price for which the customer trades, tick the Fixed amount box.

Value
- Under Discount value, enter the amount, in a number of dollars, that the customer receives at a discount.
Free shipping
If your discount code is to be in the form of free shipping, select the item Free shipping.

Countries
Under Countries, select which countries the free shipping covers.
- All countries are if the free shipping is to include all countries.
- Selected countries are if the free shipping should only include certain countries. In the search field below (Search countries) you can search for the countries that should be covered by the free shipping.
Shipping rates
- Exclude shipping rates over a certain amount if you want to exclude shipping rates over a certain amount. If you tick the box, enter in the field below the highest price that the freight may cost before the discount code is no longer valid.
Buy X and get Y discount code
If your discount code is to be in the form of the customer ordering a product for free when purchasing another particular product, select Buy X and get Y.
Customer buys
Then you must fill in the information in the box with the heading Customer buys, where you must decide which products the customer must buy to use the discount code.

- Minimum quantity of items is if the customer has to buy a certain number of products to be able to use the discount code.
- Minimum purchase amount is if the customer has to buy in order to a certain amount to use the discount code.
- In Quantity, enter the number of items. If you have selected Minimum purchase amount, you will instead have to enter the minimum amount, and the field will then be called Amount.
- Under Any items from, specify whether the discount code applies to specific products or products from specific collections.
- In the search field Search products, you can search for the products or collections on which the discount code can be applied. Once you find the collection or product to be covered by the discount code, simply click on it.
Customer gets
The next thing you need to specify is what other product the customer gets when purchasing a particular product.

- Select the number of products that the customer must add to their basket to use the discount code. You do this in the field under Quantity.
- Under Any items from, select which other products or collections the discount code includes. Use the search box below to find the product or collection.
- Under AT A DISCOUNTED VALUE, you must choose whether the customer should have a certain percentage discount on the product or whether the product is included free of charge.
- Finally, specify whether there should be a maximum number of times a customer can use the discount code. If the discount code is to have a limit on the number of times it can be used, check the box Set a maximum number of uses per order. In the field below, enter the number of times the code can be used.
General for all discount codes
The following steps apply to all types of discount codes.
Applies to
Under Applies to you can choose between 3 options.

- All products are if your discount is to include all products.
- Specific collections are for if you want the discount code to only work on a specific collection of products.
- Specific products are for if you want the discount code to only work on certain products.
When you check Specific collections or Specific products, a search box will appear below. Here you can search for specific collections or products in your selection for which you want the discount code to apply.
Minimum requirements
The next thing you need to look at is the box labeled Minimum Requirements. Here you must specify whether there should be any minimum requirements to use the discount code. It looks like this:

- None if you do not want to set any prerequisites for the use of the discount code.
- The minimum purchase amount ($) is for if you want to set a minimum amount that the customer must buy in order to use the discount code.
- Minimum quantity of items is for if you want to set a minimum number of items / products that the customer must buy to use the discount code.
If you have selected Minimum purchase amount ($) or Minimum quantity of items, a field will pop up below.

If you select Minimum purchase amount ($), enter in the field the amount for which the customer must at least shop to use the discount code.
And, if you select Minimum quantity of items, you must enter the number of products / items that the customer must buy in the field to use the discount code.
In the box titled Customer eligibility, select the types of customers to the discount code should apply to.
Customer eligibility

- Everyone is there if your discount code is to apply to all customers who shop at your webshop.
- Specific groups of customers are for if the discount code should only apply to certain customer groups.
- Specific customers are for if the discount code should only apply to individual customers.
If you select Specific groups of customers or Specific customers, a search box will pop up below.

In the search group Search groups of customers, you can search for the different customer groups for which you want the discount code to apply. The same applies if you select individual customers (Specific customers).
Usage limits
The next thing you need to choose is how many times a customer should be able to use the discount code. You do this in the box labeled Usage Limits.
It looks like this:

- Limit number of times the discount can be used in total is for if you want to limit the number of times the customer can use the discount code to a certain number. When you check the box, a field will pop up below where you need to enter the number of times the discount code can be used in total.
- Limit to one use per customer is for if you want to limit the number of times the customer can use the discount code to only once.
Active dates
The last thing you need to do is enter the start date and end date for the period during which your discount code should be active / valid. You do this in the box with the heading Active dates, which looks like this:

- Click the date in the Start date field. A calendar will then pop up where you can select the start date for the validity of your discount code.

- Select the date on the calendar
- Then click on the Start time field and select which time the discount code should be valid from.
- If you also want to set an end date for the validity of the discount code, tick the Set end date box. Then, in the same way as with the start date, select the end date and time.
Save discount code
Now you have been through all the things that need to be done to make a discount code for your webshop. All you have to remember to do at the end is click the Save discount code button.
You can either click the button at the top right or bottom right. It is very important that you remember to do this as otherwise all your work will not be saved.

Gift card
Create gift cards
To create a new gift card, click on Products in the menu on the left. Then click on Gift cards. Then you will come to a page that looks like this.

Then click on the green Issue gift card button.
Enter code and value

Issue gift card
- Gift card code is where you enter the code that the customer must enter to redeem the gift card.
- Initial value is the field where you must write the amount on which the gift card must be.
- Expiration date is where you can choose whether the gift card should have a specific expiration date. To give the gift card an expiration date, click on Set expiration date. Then a new field will pop up.


- Click the small calendar icon in the field to set an expiration date.
- You can also enter it in the field if you prefer.

If you regret having an expiration date on the gift card and would rather have the gift card used indefinitely, simply select No expiration date.
Complete and issue gift cards
The last thing you can do before creating the gift card is attach a note to the gift card. You do this in the field under Notes. The note can, for example, be an explanation of why the gift card was created, or in what context it was created in.
The customer will not be able to see the note, so think of it as just information you can add, to make it easier to keep track of your gift cards if you create more.

Remember to save your changes by clicking on the green Save button to create the gift card.
Webshop – Blog Posts
In this guide you can see how to easily make blog posts on your webshop. Blog posts can be used for many different things, such as bringing news about your business, telling about new products and more.
Click on the Online Store at the bottom of the menu on the left, and then click on Blog posts in the menu that unfolds below.

Then click on the green button named Create blog post.
Add title and content
Once you have clicked on Create blog post you will be taken to the page where you need to add the actual text to your blog post.

Blog posts
- Title is the field where you should write the title of your blog post.
- Content is where you need to add the actual textual content of your blog post.
Add summary of your blog post
If you want, you can add a summary of your blog post so the reader can skim through what your post is about before reading the entire post.

To add a summary, simply click on the Add excerpt button and you can then write your summary.
Visibility
In the box titled Visibility, you can choose whether you want your blog post to be visible or hidden. In addition, you can choose whether the post should be published at a specific time in the future.

- Visible means your blog post will be visible
- Hidden means your blog post will be hidden until you change it.
- Under Set visibility date, you can choose which date and time your post should be published. Simply click on the blue font.
- Click on the box with the small calendar icon to set a date.

- Then click Select a time to select a specific time on the selected date for publishing the blog post.

- If you regret setting a date and time for the publication, you can easily remove it again by clicking on Clear date…
Add an image to your blog post
In the box to the right with the heading Featured Image, you have the option to select an image that should be the front page of your blog post.

To add an image, just click the Add image button. Then a pathfinder will pop up where you can select an image from your computer.
Specify the author and where the blog post should appear
Just below where you just added an image you will find a box titled Organization. In this box you have the opportunity to indicate who the author is and choose where on your webshop the blog post should be.
For example, your blog post may be about news. Thus, it would be appropriate to have the blog post under “News”.

- Author is the author of the blog post. You can click on the field and choose between the different users who may have a login to edit your webshop. By default, it will automatically appear on the login you use.
- Blog is a field where you can choose between different categories for your blog posts, or create some new ones. As shown in the picture, ours is automatically on News. By clicking on the field, you can choose between different places or create new locations yourself by clicking on Create a new blog.

- When you click on Create a new blog, the Enter a blog name field will pop up below. Here you have to write the name of the new category / location you want to create.
- Tags is a field where you can add different tags to your blog post that relate to what the post is about. It could, for example, be a new product, news, etc.
If you are creating a new blog, be sure to make a link to it in the menu on your webshop. For a review of how to make such a link, we refer to the section Navigation.
Save blog posts
The last thing you need to do before you finish is save your blog post. You do this by pressing the green Save button, which you will find in the upper and lower right corners, respectively.
Remember that it is important that you save your work so that you do not have to start all over again.

Webshop – Pages
With the Pages function in Shopify, you can create secondary pages on your webshop website, which can be used for a number of different things.
For example, you can use this feature if you would like a Contact Us page, Terms and Conditions or an About Us page on your webshop. In this guide you can see how to make such a page and an associated link.
Create new page
To create a new page for your webshop, click on the Online Store in the menu on the left of your Shopify Home Page. Then click on Pages and you will come to a page that looks like this:

To create a new page, click on the green Add page button, which you will find at the top right and in the middle of the page.
Create content for the new page
The first thing to do is give your new page a title and write the content that should be on it.

Page details
- Title is the field where you have to write the title of the page.
- Content is where you need to create the textual content you want on the page. For example, you may want a page where the customer can contact you through a contact form. Here you can rightly write a friendly text explaining that the customer can fill out a contact form and that you will reply to them as soon as possible.
It is no coincidence that we use the example of a contact page here. Shopify has an automatic contact form that you can use on your site. Later in this guide, it will be explained how to use this particular feature, but first we’ll just look at some standard features that apply to all pages you create.
Select visibility or publication date

Visibility
- By selecting Visible, you can make the page visible to visitors to the webshop as soon as you have created it.
- If you select Hidden, the page will be hidden from visitors to the webshop. The reason for making the page invisible can be, for example, if you want to work continuously on the content and only publish the page when everything is done.
- By selecting Set visibility date, you can select a specific date in the future where the page will be published. This way, you can first select Hidden and then Set visibility date to determine a release date at a later time.
If you select a publication date, 2 fields will pop up below. Here you must select the date and time of publication.

- Under Visibility Date, click the small calendar icon to select the date of publication
- In the field just below you can enter the time of the date of publication.
Select page template
In the box titled Theme template, you have the option to select a template for your page.

- Depending on which Shopify theme you use, the choice of templates will vary. In the theme used in this guide, there is only the Default page and Contact.
- Default page is a standard page where the only content will be the text you create yourself.
- Contact is the specific template with a contact form.
Finally, remember to save the page. You do this by clicking on your green Save button.

Note that you have now only created one page. In order for the customer to be able to find the page and see it, you must create a link to the page in the menu on your webshop.
Webshop – Menu (Navigation)
Go to navigation
Once you have created a new page, possibly with a contact form, you must link to the page on your front page so that your customers can see and find it. In this guide, we take as our starting point an example with a Contact Us page, with a contact form template.
First, go to the menu on the left side and click Navigation under the Online Store. Then you will come to this page:

Menus
You must now choose whether you want the link placed in the top menu or the submenu on your webshop front page.
- Click on the Footer menu if you want the link at the bottom of the page.
- Click on Main menu if you want the link at the top of the page.
In this example, we select the Footer menu, but the procedure is the same if you select the Main menu. Once you have clicked on the Footer menu you will be able to see the box shown below.

- Click Add menu item

- Name is the field where you have to write the name the link should have. If you want the ‘button’ that the customer should be able to click on to be called ‘Contact Us’, enter this in the field.
- Click on the field under Link.

- A number of different options will appear on a list.
- Select Pages.

- When you click on Pages you will be able to choose between the pages you have created. Select the page you want to link to. In this example, we select the Contact Us page, which we reviewed in the Pages Guide.

- Click the green Add button at the bottom right.
Then you will see a list of the different links that are in your Footer menu. You can move them by clicking, holding and dragging the items up and down the list. On the website, they will be in the order you choose here.

- Once you have chosen the order in which your links should be, click on the green Save menu button at the bottom right.
- Finally, you can see what the result looks like by clicking on the small eye icon next to the Online Store in the menu on the left.
See preview of link and page
Here you can see what the link looks like in the menu at the bottom of the webshop page.

And here you can see what the page itself looks like when you click on Contact us under Quick links.

Webshop – Preferences
With Shopify Preferences, you have the ability to configure a variety of preferences that have to do with both search engine optimization, spam protection, and password restriction.
The first thing you need to do is click on the Online Store in the menu on the left. Then click on Preferences. Once you have done this, you will come to a page that looks like this:

As mentioned at the beginning of this guide, you have the option of configuring a number of different things. Therefore, you do not necessarily need to perform the following steps in the order in which they appear.
Common to all the preferences is that you must remember to save when you have made changes. You save by pressing the green Save button, which you will find at the top and bottom right of the page, respectively.

Title and meta description
The first thing you can configure is the title and meta description of your webshop, which pops up in the search results when a customer searches in Google for keywords that relate to either your products or services on your webshop.
Your title and meta description are closely related to search engine optimization (SEO) and can have an impact in terms of how far up your website will be on the list of search results in various search engines such as Google.
If you do not know what search engine optimization is all about, the easy explanation is that it is about adapting your website texts to the keywords your customers use when searching for a product that you are selling.

Title and meta description
- Homepage title is the headline / title that appears first in Google search results.
- Homepage meta description is the meta description that will be under the heading / title in the search result.
Common to both the title and the meta description is that it is a good idea to implement as many keywords as possible. Keywords are the words that relate to your products or your business.
For example, if you sell t-shirts without print, you could implement keywords such as t-shirts, men, women, without print, without print, etc. in the meta description. The best way to implement the keywords is to write a living text where the keywords occur naturally.
An example of a living text with the aforementioned keywords could sound like this: “With us you will find the country’s largest selection of t-shirts without print or print for both men and women of all sizes.”.
Google Analytics
We recommend that you create a Google Analytics account if you do not already have one. In the field under Google Analytics account, you can enter your tracking code from Google to track all visits to your webshop.
Through Google Analytics, you can obtain valuable data with an overview of which pages your customers typically visit, as well as which traffic sources can generate sales. Remember to turn on e-commerce tracking in Google Analytics under Admin settings.

- To link your Google Analytics account, click Paste your code from Google here and paste in your Google code.
Facebook Pixel
If you do not already have a Facebook Pixel account, we recommend that you create a Facebook Manager account from which you can create your Facebook Pixel. You can enter your Pixel ID to connect Facebook Pixel with your webshop.
Facebook Pixel can be used to create advertising campaigns that can help find new customers who are similar to those who shop at your webshop.

- To connect your Facebook Pixel account, click on the Paste your Facebook Pixel ID field here and enter your Facebook Pixel ID.
Customer privacy
- You can give your customers the opportunity to control their data and how much may be collected. Under GDPR law, you should enable Limit data collection for EU buyers. Customers must then give their consent to what data may be collected.
- The bottom box, Limit data collection for California buyers, only applies if your webshop is US or international, and should be activated under CCPA for the sake of California laws.

Password protection
If for some reason you want to restrict access to your webshop, you can easily add a password. This could be, for example, if your webshop is under development and only opens to customers at a later date.

- In the Password field, enter the code to be used to access it.
- In the Message for your visitors field, you can write a message that appears when a customer visits your webshop.
Spam protection
To protect your webshop from spam and abuse, you can turn on Google reCAPTCHA on comment and contact forms. When this feature is turned on, some customers will need to complete a reCAPTCHA to post a comment or submit a query.
reCAPTCHA can protect against bots and misuse of your webshop as it requires a real person to perform the function.

- You can easily turn Google re CAPTCHA on and off by clicking the small box next to Enable Google reCAPTCHA to checkout.
Settings
Now that we have just reviewed Preferences in the section above, this section may seem a bit repetitive, but in this section we are talking about various settings, such as your webshop’s general settings or payment, checkout, etc.
Preferences are more or less just your preferences for, for example, whether you want spam protection, set up Google Analytics and / or Facebook Pixel, or redirect the domain, as needed.
In the lower left corner you will find an icon of a gear, next to the text Settings. After clicking the button you will be greeted with a page that looks like this:

General settings (Large details)
At our first stop in Settings, we take a look at the settings in Store details. These settings mainly include the information about your webshop such as. the store’s name, contact information – or if the store is owned by a company – the company’s legal name.
Store contact information
Here you can change the name of your webshop as well as contact information.

- Store name is the name of your webshop.
- Store contact email is the email address for your webshop. Should Shopify choose to contact you it will be on this email.
- Sending email is the email address that your customers will see when you send them an email or when they receive an email from you.
Store industry
Below the two fields under Store industry is a drop-down menu, with the text “Other”. Click the drop-down menu to open it and select a category that best describes your webshop or what you sell.
This is not required, then there is no category that describes your webshop, you can just settle for “Other” or “I have not decided yet”.

Store address
Here you will be able to enter information about your company’s address and which country / region the company is located in.

Standards and formats
Standards and format are used to calculate product prices, shipping weight and times for the order.

- Time zone is the time zone of your region. It is important that you set the right time zone, otherwise there may be confusion among your customers as to when the order is shipped or was shipped.
- Unit system indicates which unit formula you want to apply to your webshop. This can be Metric system, ie. metric formula, or Imperial system, ie empirical formula.
- Default weight unit is how you want to measure the weight of your products. You can choose between kilograms or grams.
EDIT ORDER ID FORMAT (OPTIONAL)
In short, order numbers start from # 1001 by default, and since you will not be able to change the order number itself, you will have the option to add a pre- and suffix. This could be, for example, “EN1001” or “1001-A”, as mentioned in the English example. However, this is optional.
Store currency

Store currency is the specified currency on your webshop that your customers expect them to pay with. Therefore, it is important that you specify an appropriate currency, because after your first sale you will not be able to change the currency on your webshop.
Click on the drop-down menu below the text “Store currency” to select a currency. If you click on the blue text, “Change formatting”, the box will unfold and you will then be able to change the formula of your currency.

Under CURRENCY FORMATTING you can change the formula for how the currency is displayed on your products.
- HTML with currency is used in the Online Store and your Shopify admin panel.
- HTML without currency is also used in the Online Store and your Shopify administration panel.
- Email with currency is used in your notifications.
- Email without currency is used in your notifications and Order Printer templates.
As always, remember to save your changes by clicking the green Save button.

Settings – Subscription (Plan)
Here you can change your Shopify plan or cancel it and change the payment method. Click Plan in the Settings menu, just below Store details.

Click the green Change plan button to change your Shopify plan. Next, you will be able to see which plan you are currently running on. Please note that you can not receive payments on a Development plan and must therefore be on a Basic, Normal or Advanced plan.
Settings – Billing
Here you can see your current Shopify plan and change the payment method. Click Billing in the Settings menu, just below Plan.

Settings – Users and permissions
Here you can create new administrative users in your webshop. This could, for example, be employees, designers or developers hired from outside. Click Users and Permissions in the Settings menu.

Click the green Add staff button to add a new admin user. Next, give this user a set of permissions that best suit the user’s needs.
Settings – Payments
Next point is payments. Click Payments in the Settings menu, just below Users and permissions.
Payment providers
After you have clicked on Payments, you will have to find out which payment solution your webshop should run with.

You can simply ignore the message indicating that it is a developer shop; this we will go over in a later section. It just means that you can not set up a real payment solution as long as the shop is on a developer plan.
Shopify Payments
Basically, Shopify has their own payment solution. By switching to Shopify Payments, you will be able to approve payments at an interest rate of as low as 1.9% for a total of $0.26. per transaction.
The View payouts button shows you an overview of all transactions from Shopify Payments.
Click the green Activate Shopify Payments button to get started with the setup.
After you start the setup process, you will be greeted with a pop-up that looks like this:

If you run your webshop as an individual or sole proprietor, the small box must be ticked. If not, then your business needs to be confirmed first.
Here you will need to provide some information about your company as well as the company’s employees.

After filling in the information for the two points, it’s time to choose your preferred payment methods.

- Standard rates are an overview of interest rates, and depend on your Shopify plan and are applied to all payment methods if they are not shown in the table.
- Cards are simply which credit cards the customer has the option to use at checkout.

- Shop Pay makes checkout easy and fast for your customers by securely storing their shipping and payment information. Please note that short-term interest rates come into effect here.
- Wallets are used for digital wallets such as Apple’s or Google’s own wallet money, Google / Apple Pay. Please note that short-term interest rates also come into force here.

- Local payment methods are country-specific payment methods and are a good way to improve the conversion rate.
- Countries / regions indicate the exchange rates set for the international market.
Settings – Payout details
All your earnings are deposited into this bank account, and you can then select the frequency of your withdrawals and edit the way they are described in your account statements.

- Payout statment descriptor is how the payouts appear in your account statement. For example, there could be something like: “My webshop (Shopify)”, to indicate that it is from this webshop and that it is run by Shopify.
- Payout schedule indicates when the payout is to be made. If the box next to “Enable notifications” is checked, you will receive a message via email that the payment was completed.

- Fraud prevention can reduce credit card fraud in your webshop by adding extra security.
- Customer billing statement allows you to change how the name and phone number appear in your customers’ account statements.
- Test mode is used to test your Shopify Payments setup and configuration by simulating successful and unsuccessful transfers.
As always, remember to save your changes by clicking the green Save button. If you click on the red button, you will turn off Shopify Payments.
PayPal Express Checkout
Paypal is pretty easy to set up. You sign up with PayPal as a business, and then enter your email with PayPal.

If you already have a PayPal account, you can simply click the gray button to associate it and go through the setup process.
Alternative payment methods
Alternative payment methods can be used as an add-on to either a third-party provider or Shopify Payments.
Click on the gray button Choose alternative payment to select an alternative payment method.

After clicking the gray button, you will have to choose which redeemers you would like to use.

QuickPay
Since there is a sea of different providers, it may seem a bit confusing. Therefore, I would recommend QuickPay.
Scroll down to the bottom of the page and click on QuickPay. You can also just search for “QuickPay” in the search box.

Next, under Account information, enter your agreement ID / agreement no.
Under User Agreement’s API key, enter your API key from QuickPay.
QuickPay has created their own guide on how to set up QuickPay with Shopify. You can find it here.
After entering the information provided, scroll down to the bottom and click on the green Activate QuickPay button.
Manual payment methods
This item deals with payments that are processed outside of your webshop. When a customer makes a manual payment, you must first approve their order before the payment is completed.

If you click on the gray button / dropdown menu, Manual payment methods, you can choose what kind of payment method it should be, or you can create your own by clicking on “Create custom payment method”.
For example, if you offer pick-up, you could only withdraw the money after the customer has picked up the item. You will typically use Cash on Delivery (COD) for this.

- Create custom payment method is to create a custom payment method, which could for example be “Collection”.
- Bank Deposit activates the payment method for bank deposit.
- Money Order activates the payment method for money order.
- Cash on Delivery (COD) activates the payment method for cash payment upon delivery.
Payment capture
Once a customer’s payment method is approved, it must be registered so that the sale can be processed. Here you can choose between automatic and manual treatment.

Click on the blue text, “Manage”, after which a pop-up will open with the aforementioned options.

- Automatically processes payment against order.
- Manually means that processing against order must be done manually and within a certain time period.

If you have selected Manually, you can check the small box to receive emails about when the registrations are about to expire.
Settings – Payment / Checkout
Now that we have set up payment, we must also have set up checkout. Click Checkout in the Settings menu, just below Payments.
Customer accounts
Here you will be able to choose whether you want to give your customers a message to create an account at checkout.

- Accounts are disabled means that customers can only check out as a guest.
- Accounts are optional means that it is not required to have an account, but that the customer still has the option to create one or just check out as a guest.
- The Accounts are required means that customers must have an account on your webshop before they can check out. Usually this option is more justified B2B shops, ie Business-to-Business.
Customer contact
Here you can choose which contact methods your customers can use at checkout to receive updates about their order.

To check out is for when customers need to check out.
- Customers can check out using either their phone number or email allowing customers to check out with either their phone number or email and receive updates on their order via SMS. However, this means that their email may not be collected at checkout.
- Customers can only check out using email means that customers can only check out via email.
To receive shipping updates is for whether customers should receive shipping updates.
- Customers can choose to add a phone number or email to receive shipping updates after they complete their order allowing customers to choose whether to enter their phone number or email to receive shipping updates after completing their order.
- Customers can download the Shop App from their order status page allowing customers to download the Shop App from their order status page.
Form options
Here you can choose whether your checkout form requires some extra information from your customers.

Full name is the field for the customer’s full name.
- Require last name only means that customers only need to provide their last name.
- Require first and last name means that customers must provide both first and last name.
Company name is the field for company name.
Address line 2 (apartment, unit, etc.) is the field to address line 2, ie. floor, etc.
Shipping address phone number is the field for customers’ phone number for the specified shipping address.
- Hidden keeps the field hidden.
- Optional makes the field optional.
- Required makes the field required.
Tipping
Here you can add the option for your customers to put a tip at checkout.

- Show tipping options at checkout allow your customers to give a little extra tips from their purchases to show their support for your business.
Order processing
Here you can change how your webshop responds to checkout and order processing.

While the customer is checking out is on while customers are checking out.
- Use the shipping address as the billing address by default means that the customer’s shipping address is used as the default billing address and reduces the number of required fields. The billing address can still be edited afterwards.
- Require a confirmation step requires customers to review their order before they can complete the purchase.
- Enable address autocompletion provides customers with address suggestions when entering their shipping and billing address.
After an order has been paid
- Automatically fulfill the order’s line items means that after the order is paid for individual products to be filled in automatically.
- Automatically fulfill only gift cards of the order means that only gift cards on the order are filled in automatically.
- Do not automatically fulfill any of the order’s line items means that after the order is paid that individual products are not filled automatically.
After an order has been fulfilled and paid
- Automatically fulfill the order’s line items gør, at efter ordren er betalt at enkelte produkter automatisk udfyldes.
Marketing consent
Here you can give customers the opportunity to subscribe to your newsletter via email and SMS at checkout.

Email marketing allows you to send your customers commercial emails to their email.
- Show an option to subscribe at checkout shows an option to subscribe to your newsletter at checkout.
- Preselect the option means that the box is already checked.
SMS marketing is like email marketing, but just on SMS.
- Show an option to subscribe at checkout shows an option to subscribe to your newsletter at checkout. This will only be visible on handheld devices like mobile phones.
Abandoned checkouts
Here you have the opportunity to send an email to customers who have put products in their basket, but have not completed the order after a certain period of time.

- Automatically send abandoned checkout emails – if checked, an email will automatically be sent to customers who have left checkout without completing their order.
Send to
- Anyone who abandons checkout sends an email to anyone who leaves checkout without completing their order.
- Email subscribers who abandon checkout only send an email to those who have subscribed to your newsletter.
Send after – first sends an email, after the hours specified below:
1 hour – 1 hour
6 hours – 2 hours
10 hours (recommended) – 10 hours, recommended by Shopify
24 hours – 24 hours
Customize email
If you click on the gray button, Customize email, you can customize how the email should appear to your customers. This will probably seem a bit technical as it includes some code.

- Email subject is the field for which subject the email should have. It could, for example, be “Complete your order”.
- Email body (HTML) is the actual code structure of your email. It may seem a little overwhelming at first glance, but is relatively easy to find around.
Shopify uses their own template language, Liquid, which is technically the piece of code language on which Shopify’s infrastructure is built. It makes it easy to code simple things as conditions, such as at the top of Email body:

Here it is checked that only one product has been added to the basket, after which it then sends an email with it in singular. If there is now more than one product in the basket, {% else%} enters cancer and sends that part of the email as a majority. It is important to close a code block, otherwise errors will occur. In this example, what is called an “if statement” is used, so to close that code block you must write {% endif%} as shown in the code.
There is a lot more to dive into, so I would recommend reading Shopify’s documentation on how to use Liquid variables. You can read about it here.
Additional scripts
Here you can add external scripts for tracking customer actions or other adjustments to the order status page.

Order status page
You are adding scripts to this box. Scripts can usually be downloaded from third parties as needed.
Checkout language
Do you have to choose which language your checkout should be in. Of course, it must match the language of your webshop.

Click the gray Manage checkout language button to get started. Next, you will be greeted by a page that looks like this:

The easiest way would be to click on the Change theme language in the top right corner, right next to the green Save button, to change the language.


Now we must have set up shipping. Click Shipping and Delivery in the Settings menu, just below Checkout.
You will then come to a page that looks like this:

Delivery methods at checkout
Here you can control how your customers receive their order.
Shipping

Here you can choose where you want to ship to and how much you want to charge for shipping at checkout. Click on the blue text Manage rates to edit the rates.

Here you will have to fill in / change a number of information that best suits your needs.
CUSTOM SHIPPING RATES
Here you can create a new shipping profile. Click on the blue text Create new profile to get started.

- Name is used as a reference for you. Customers will not get to see this.
- Products you can manually add products below.
- Shipping from is where the package is sent from.
- Shipping to is which zone the package can be shipped to.
Let’s create a shipping zone for Denmark. Click on the blue text Create shipping zone.

Give your zone an appropriate name and search for “denmark”. Next, check the small box and click on the green Done box.
Now you should be able to set up VAT for your zone.

Click the gray Add rate button to enter a VAT rate.

- Set up your own rates means that you set a VAT rate yourself.
- Use carrier or app to calculate rates means that a carrier or app is used to calculate VAT.

Local delivery
Here you can choose how orders are delivered directly to local customers. Click on the blue text Manage to indicate if your shop offers local delivery. You will need to fill in a range of information that best suits your needs.
Local pickup
Here you can give customers the opportunity to pick up their order. Click on the blue text Manage to indicate if your shop offers pickup. You will need to fill in some information as before.
Packages
Here you can choose the size of the packages which are used to ship your products.

Click the gray Add package button to add a package. Next, select the length, width and height of the package.

You can also select the type of package:
- Box is for boxes.
- Envelope is for envelope / letter.
- Soft package or satchel is for if it is a “soft” package such as a bag or purse.
You can choose whether length, etc. should be measured in centimeters or inches, by clicking on the drop-down menu after Height.
You can also select a unit of measurement for weight. You can choose from: grams, kilograms, ounces (oz) or pounds.
Packing slips
Here you can edit the structure of your package leaflet. A delivery note is just a piece of paper that comes with an item to be delivered. Click on the blue text Edit to get started.

Once again, there will be a bit of code that you need to edit in. Whether you want to edit in the structure / appearance of the delivery note is completely optional.

It is recommended that you have some knowledge of HTML and CSS. Click here (English) to learn more. Remember that you can click on the green button Preview template to preview your changes / template.
Carrier accounts
Here you can link your account from a third party freight platform / carrier.

Click the gray Connect carrier account button to select a carrier.

Custom order fulfillment
Here you can customize a custom order fulfillment.

Click the gray Add fulfillment service button. Then you must enter a name and email address.
Settings – Taxes
Now that Shipping is in control, etc., it’s time to make some changes in relation to VAT and tariffs. Click Taxes in the Settings menu, just below Shipping and delivery.
Tax regions
Here you can edit how your webshop collects VAT from your shipping profiles.

Click the gray Set up button to set up a VAT rate for the region that best suits your needs.
Tax calculations
Here you can choose how your webshop should calculate and display the VAT rate, such as inclusive or exclusive VAT.

- All prices include tax means that all prices include VAT as part of shipping.
- Include or exclude tax based on your customer’s country allows you to include or exclude VAT based on the paying customer’s country / region, where it is then calculated accordingly.
- Charge tax on shipping rates means that VAT rates are included in the calculation of VAT.
- Charge VAT on digital goods means that VAT is added to digital goods.
Settings – Locations
Here you can specify where your warehouse is located, where you fulfill orders and sell your products from. Click Locations in the Settings menu, just below Taxes.
Click the green Add location button to add a new location.

Subsequently, enter some information about your warehouse and enter an address.

Settings – Gift cards
Now we have already reviewed the section for gift cards, but since it is located under Settings, it includes the settings for gift cards. Click on Gift cards in the Settings menu, just below Locations.

Auto-expiration
Have you can set gift cards to expire after a certain period of time after they are purchased.
- Gift cards never expire means that gift cards never expire.
- Gift cards expire cause gift cards to expire within a specified period of validity.
Please note that the legislation for the period of validity varies from country to country. In some countries the period of validity is 3 years from the date of issue.
Apple Wallet
Here you can give your customers a digital gift card for use online or in your physical stores.
Settings – Sales channels
Here you can change and create new sales channels. Your current sales channel, the Online Store, is created by default. As a rule, you do not need more sales channels, but if you want a sales channel with Facebook, Google, etc., for example, this is possible here.
Click Sales channels in the Settings menu, just below Markets.

Click either the gray or green Add sales channel button to create a new sales channel. Next, you can choose the sales channel that best suits your needs.

Settings – Domains
Here you can connect an existing domain, transfer your domain or buy a new domain. Basically, you can only have one primary domain for your shop.
A primary domain is the domain name customers see when browsing your shop.

- Connect existing domain connects an existing domain you purchased from a domain provider.
- Transfer domain transfers the domain.
- Buy new domain orders / buys a new domain through Shopify.
Settings – Notifications
Here you can change the messages / emails sent to your customers as well as appearance and content. Click Notifications in the Settings menu, just below Domains.

Customer notifications
This in turn will require you to change some code if you want to customize these messages. It is highly recommended that you read Shopify’s own documentation on how to do this. You can find it here.
Orders
This item includes emails sent in connection with orders.

Shipping
This item includes emails sent in connection with shipping orders as well as the status of the order.

Local delivery / pickup
These items include emails sent in connection with local delivery and pickup orders.

Customer
This item includes emails sent in connection with customer actions, such as resetting the password or welcome message.

Returns
This item includes emails sent in conjunction with return instructions.

Marketing
This item includes emails sent in connection with newsletters and that they must confirm their subscription via one of the two options if required.

Shopify Email open tracking

Staff order notifications

Webhook
This part is quite technical and I would highly recommend getting a developer to do it for you. Basically, a webhook is just, a “hook” that retrieves data from point A to point B. This is not required and is only as needed.

Settings – Files
Here you can upload files to your webshop. You can upload normal image files and documents, but you can not upload SVG files for security reasons. Click Files in the Settings menu, just below Metafields.

Click on the green Upload files button to upload a file, after which a pathfinder will open and you can then select a file from your computer.
Settings – Languages (Store languages)
Here you can change the language of your webshop. Click Store Languages in the Settings menu, just below Files.

Click the green Add language button to add a new language. Next, a list of languages will pop up, where you then have to choose the one that best suits your needs.
Click on the blue text Change theme language to change the theme language. Unfortunately, if your theme does not support a particular language, you will have to translate it manually yourself.
- Translated languages allow you to add a language for international clients, such as English.
- Account language is the language of your current user account. If you change this, everything in your administration panel will also change language.
Settings – Policies / Terms and Conditions
Here you can set up trading conditions and privacy policy etc. You can use Shopify’s own template by clicking on the gray button Create from template, or you can find a number of templates online, for example by searching for “terms and conditions template” or “cookie policy template”.

- Refund policy is for return policy.
- Privacy policy is for privacy policy.
- Terms of Service are for service terms.
- Shipping policy is for shipping policy.
- Legal notice is for legal notice.
Now you should have all the settings in place in your webshop. Now you just have to start designing your website. Either based on the theme template that you have already chosen or by finding a web designer who can do it for you.
Shopify FAQ
Here you will find the answer to some of the most frequently asked questions.


